
My mother-in-law acquired our first dining set from a yard sale several years before we were married, and we inherited it. It served us well for the first few years, but then Emily discovered Pinterest.

While in Hawaii, we turned our garage into a furniture re-design studio. The chairs were wearing out, so we sold them. The table was sanded and stripped of the old finish, then stained, painted, and sealed in a different style. Stay tuned for that.
Here's the before picture.

We acquired six chairs off Craigslist, since we had sold the old, worn-out ones. We bought them just before we moved to Virginia, so we didn't begin working on them until a couple of months ago. What a process!
First, the issue of re-upholstering the cushions. Not our first re-upholstering attempt, but definitely much more technical than the first.

Step 1. Remove old cushions and disassemble them.

Lots of staples! (This is not the last time you will hear about staples. We thought removing them was bad enough. Ugh! The smile deceiveth.)


Step 2. Set aside chair frames for sanding, stripping, and painting.

Step 3. Measure and cut batting, fabric, and vinyl to fit the old shape.


Step 4. Re-upholster.

Step 5. Get a new staple gun.
Our original staple gun, which is a bit more powerful and thus works more effectively on the pressboard seat, refused to work properly after a while and really bogged down on efforts. It was taking so long that we were struggling to do one cushion per week. Finally, we bought a new staple gun and dramatically sped up the re-upholstering process.
Step 6. Cover with vinyl for durability and people-proofing.

We put at least 50 staples into each seat cushion, and it took an extraordinarily long time to do so - adjusting, re-adjusting, removing, and re-adding staples to get the right fit. And the pressboard did not help make this a simple process. Much of the time, it simply did not want to accept staples. Real wood is much more forgiving. That whole part of the experience can be over forever.

Step 7. Paint the chairs.
The chairs with the new-and-improved cushions looked pretty good before being
re-designed, but they weren't Pinterest'd enough yet. So, we primed them, painted them white, distressed them with some dark stain to give them "the look," and sealed them with Polycrylic for durability.

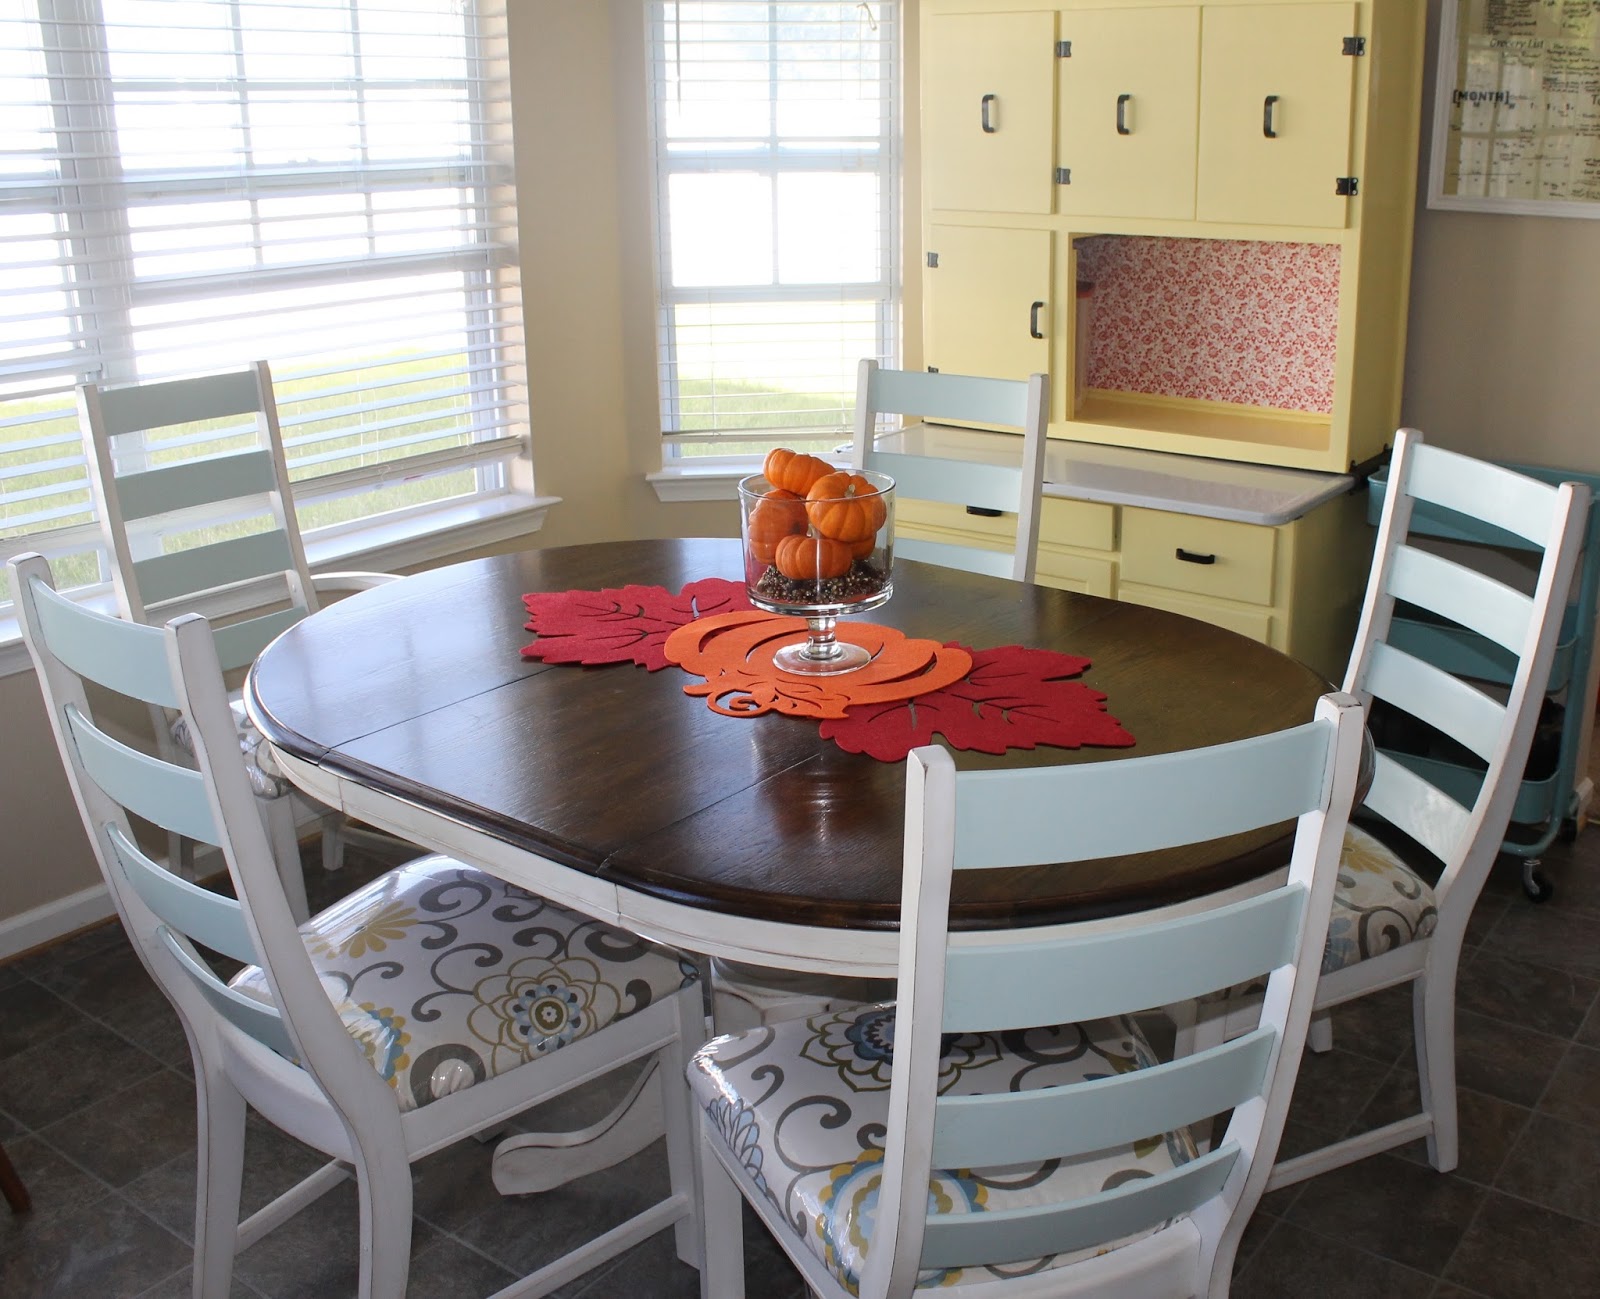
Final product!
No comments:
Post a Comment